My new (used) Cannondale R300 has proved to be a little challenging to transform into a reasonable commuter bike.

Specifically, I’ve found it a little challenging to be able to carry the amount of stuff I want, with the flexibility I want, on this frame. I’m really attempting to take a low-end “racing” geometry bike, and turn it in to a touring bike. No small feat.
 Fitting the Tubus Cosmo rear rack was pretty straight forward, thanks to the advice (and assortment of adapters and conversion parts) of Wayne from TheTouringStore.com. However, the short chain stays on this bike still gave me issue with heal clearance from time to time. Also, this rack (as seen in the picture) has a lower set of bars in addition to the upper set – and this is where I wanted my panniers to hang. Why on the lower rack? First off, I carry a fair amount of weight at times, and keeping that weight lower has advantages for bike handling and stability. Secondly, I like to put stuff on the top at times – like other cargo, or a rear “trunk” bag I have that straps to the top rails. Either of those two things make it so you can’t take panniers on and off without a great deal of trouble.
  There was also a bit of an annoying issue where the bolts that hold the hangers on the panniers were hitting various spots in the rack preventing them from hanging securely in some positions.
Unfortunately, moving the panniers to the lower rack moved me from a situation where I might hit my heel on the bags under certain circumstances, to a situation where the heel was definitely going to hit the bags each and every pedal stroke.
However, the solution to this was actually another idea that was given to me by Wayne from TheTouringStore.com. Basically, it is a small modification to the bags to make them hang at an angle instead of straight up and down. Picture the side view of a bike with a pannier hanging on it. Then, picture moving the rear, upper corner of the bag up slightly. You’ll realize that the front bottom corner – the place you foot would hit, will actually swing back slightly giving you more clearance for your heel. This was the modification I was going to make.
 My particular bags kind of, well, suck. Generally speaking, panniers are made to carry most of their load in a vertical orientation – that is to say, they are taller than they are wide. This is due in a large part to the heel clearance issue I was facing. My bags, however, are oriented horizontally. Kind of a pain in the butt. These are another one of those items that I bought early on in my cycling experience, when I didn’t really have all of the information I needed to make the best product selection. However, I have them now and I’m not in a super big hurry to replace them, especially if there is a simple modification that can make them more functional for me.
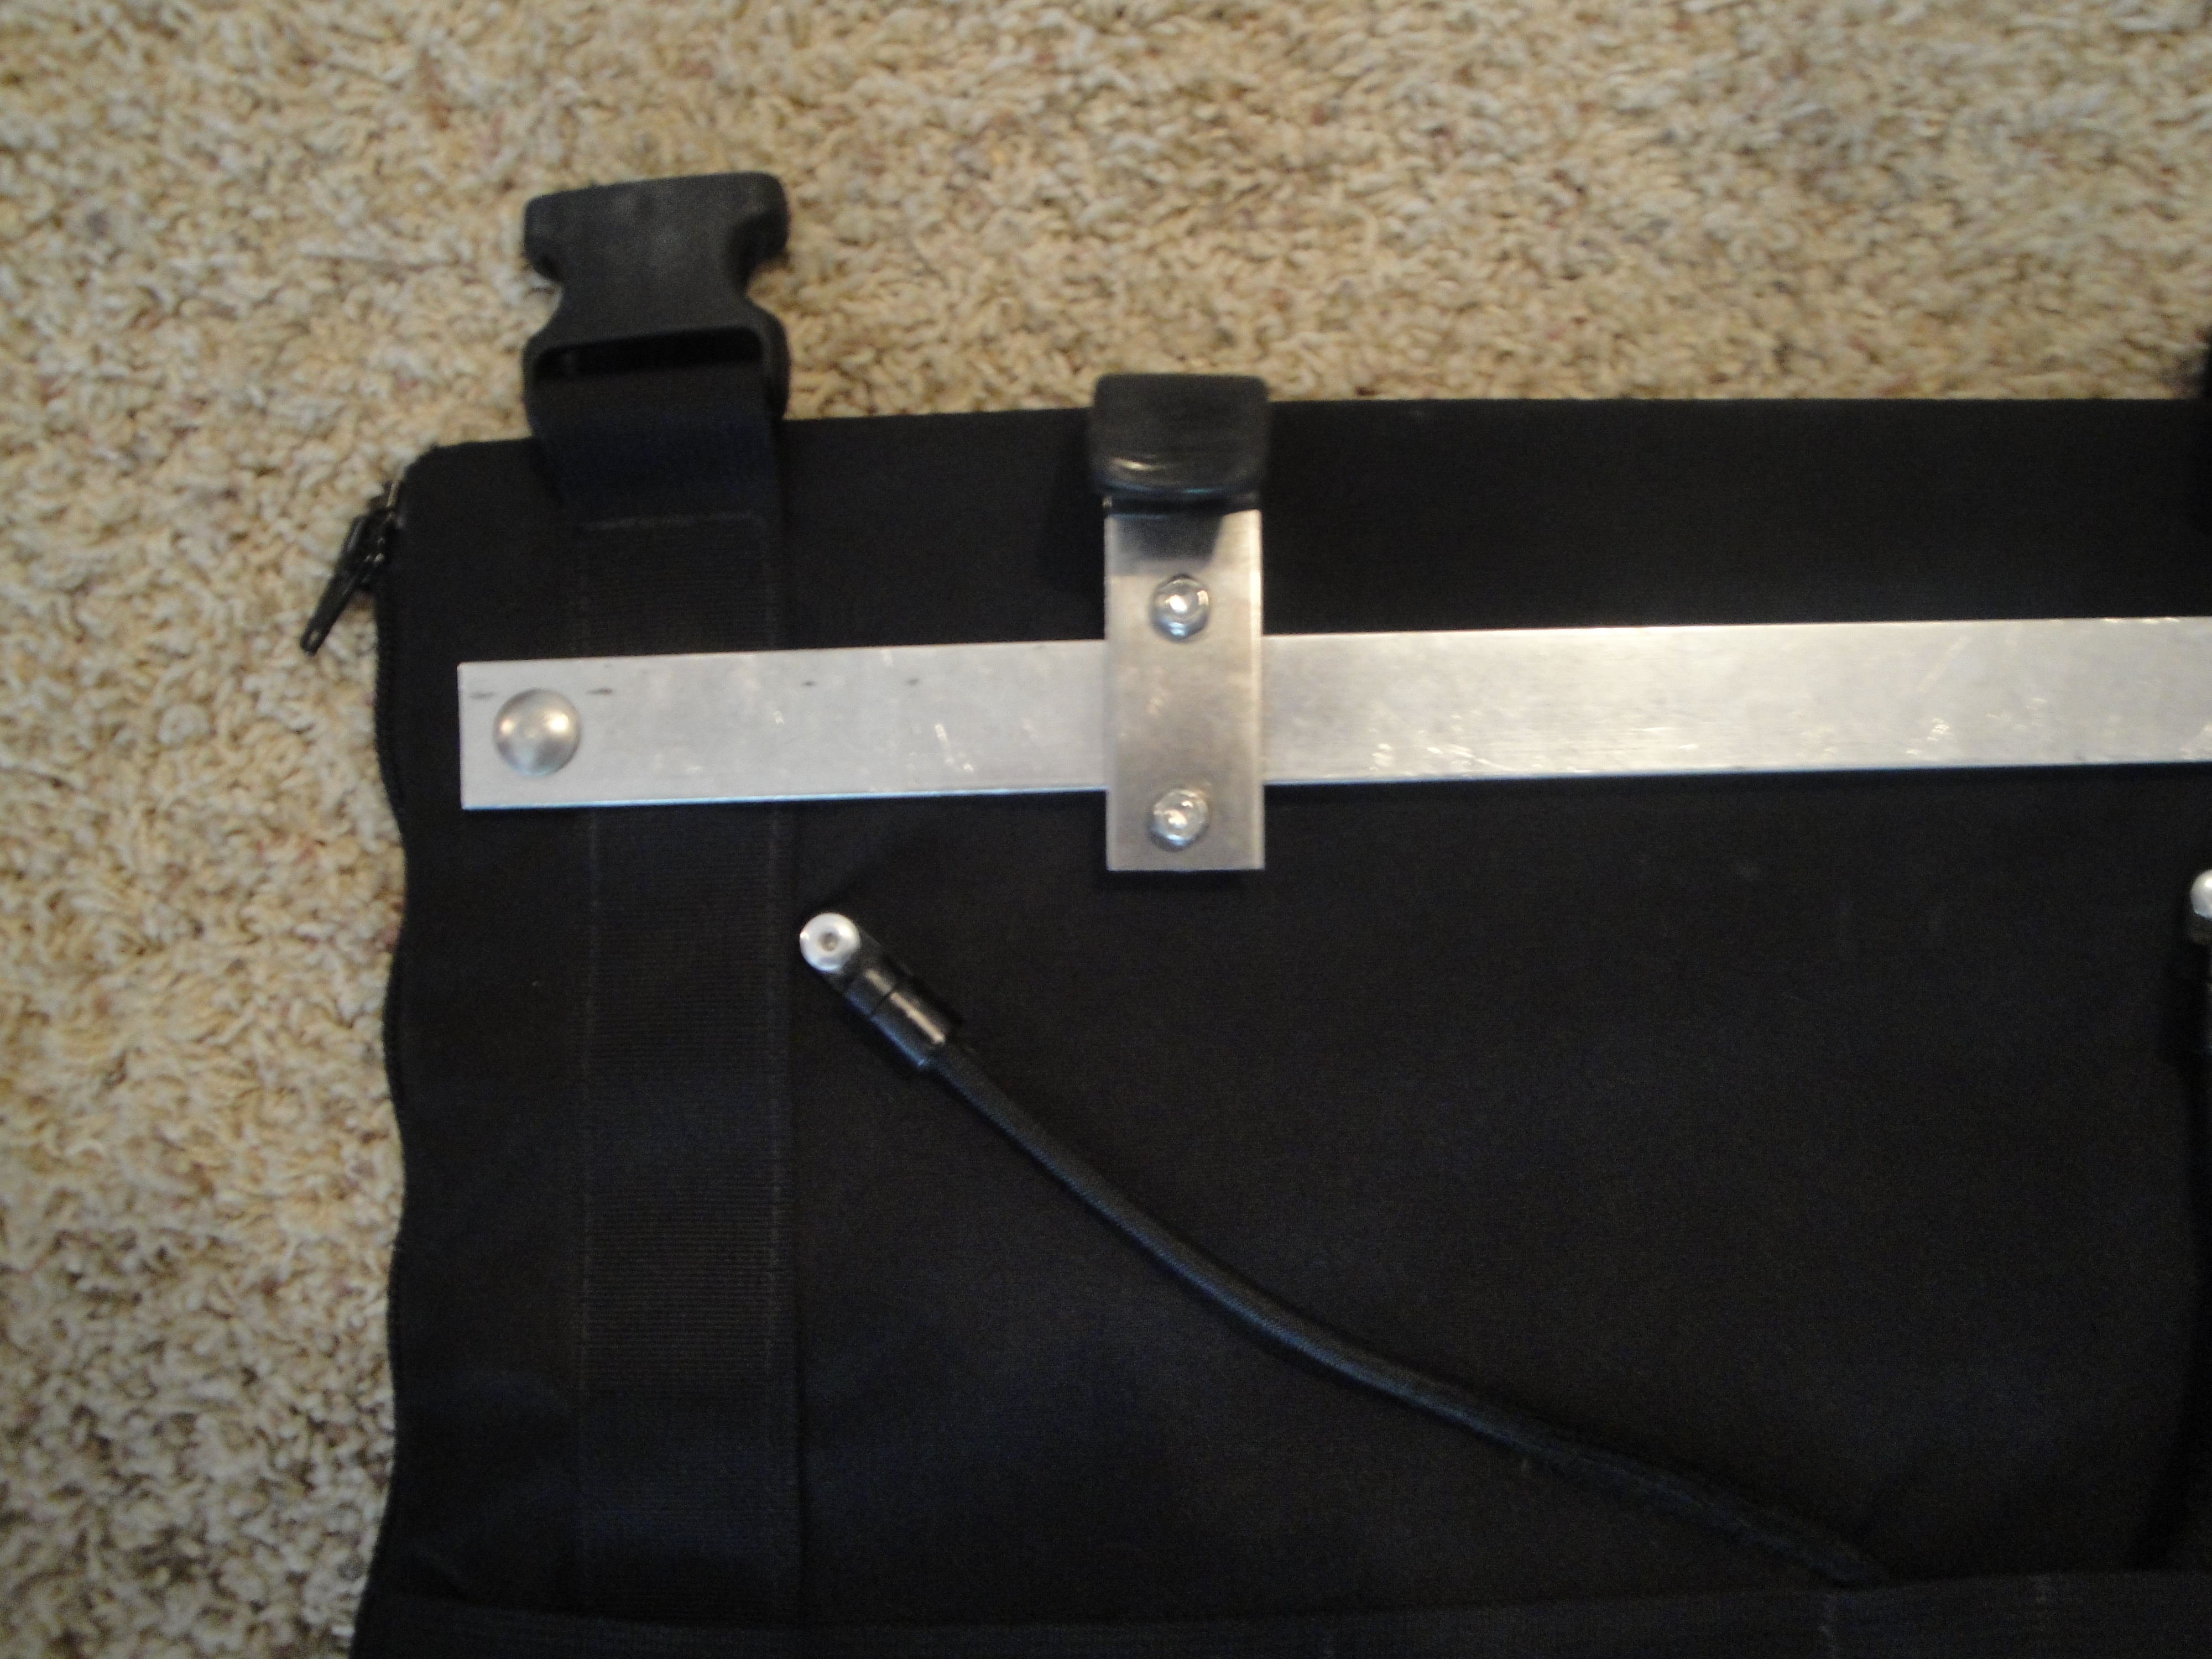
There is, however, one thing about these bags that made this modification a whole lot easier. As you can see from the photo, the bags can actually be detached from backing that attaches to the bike. This backing is a hard plastic sheet covered in canvas, sporting both straps and zippers on both ends. The zippers are how the bags are attached, but you can also use the straps (sans bag) to attach stuff that might not fit into the bags – think sleeping bag here.
This makes things easier for me, because what I need to do is rotate the attached aluminum bar in a way that will cause the front, bottom corner to rotate back and up. The aluminum bar is simply bolted through the plastic sheet on both ends. All I need to do is unbolt the back end of this bar and drill a new hole in the plastic lower down.
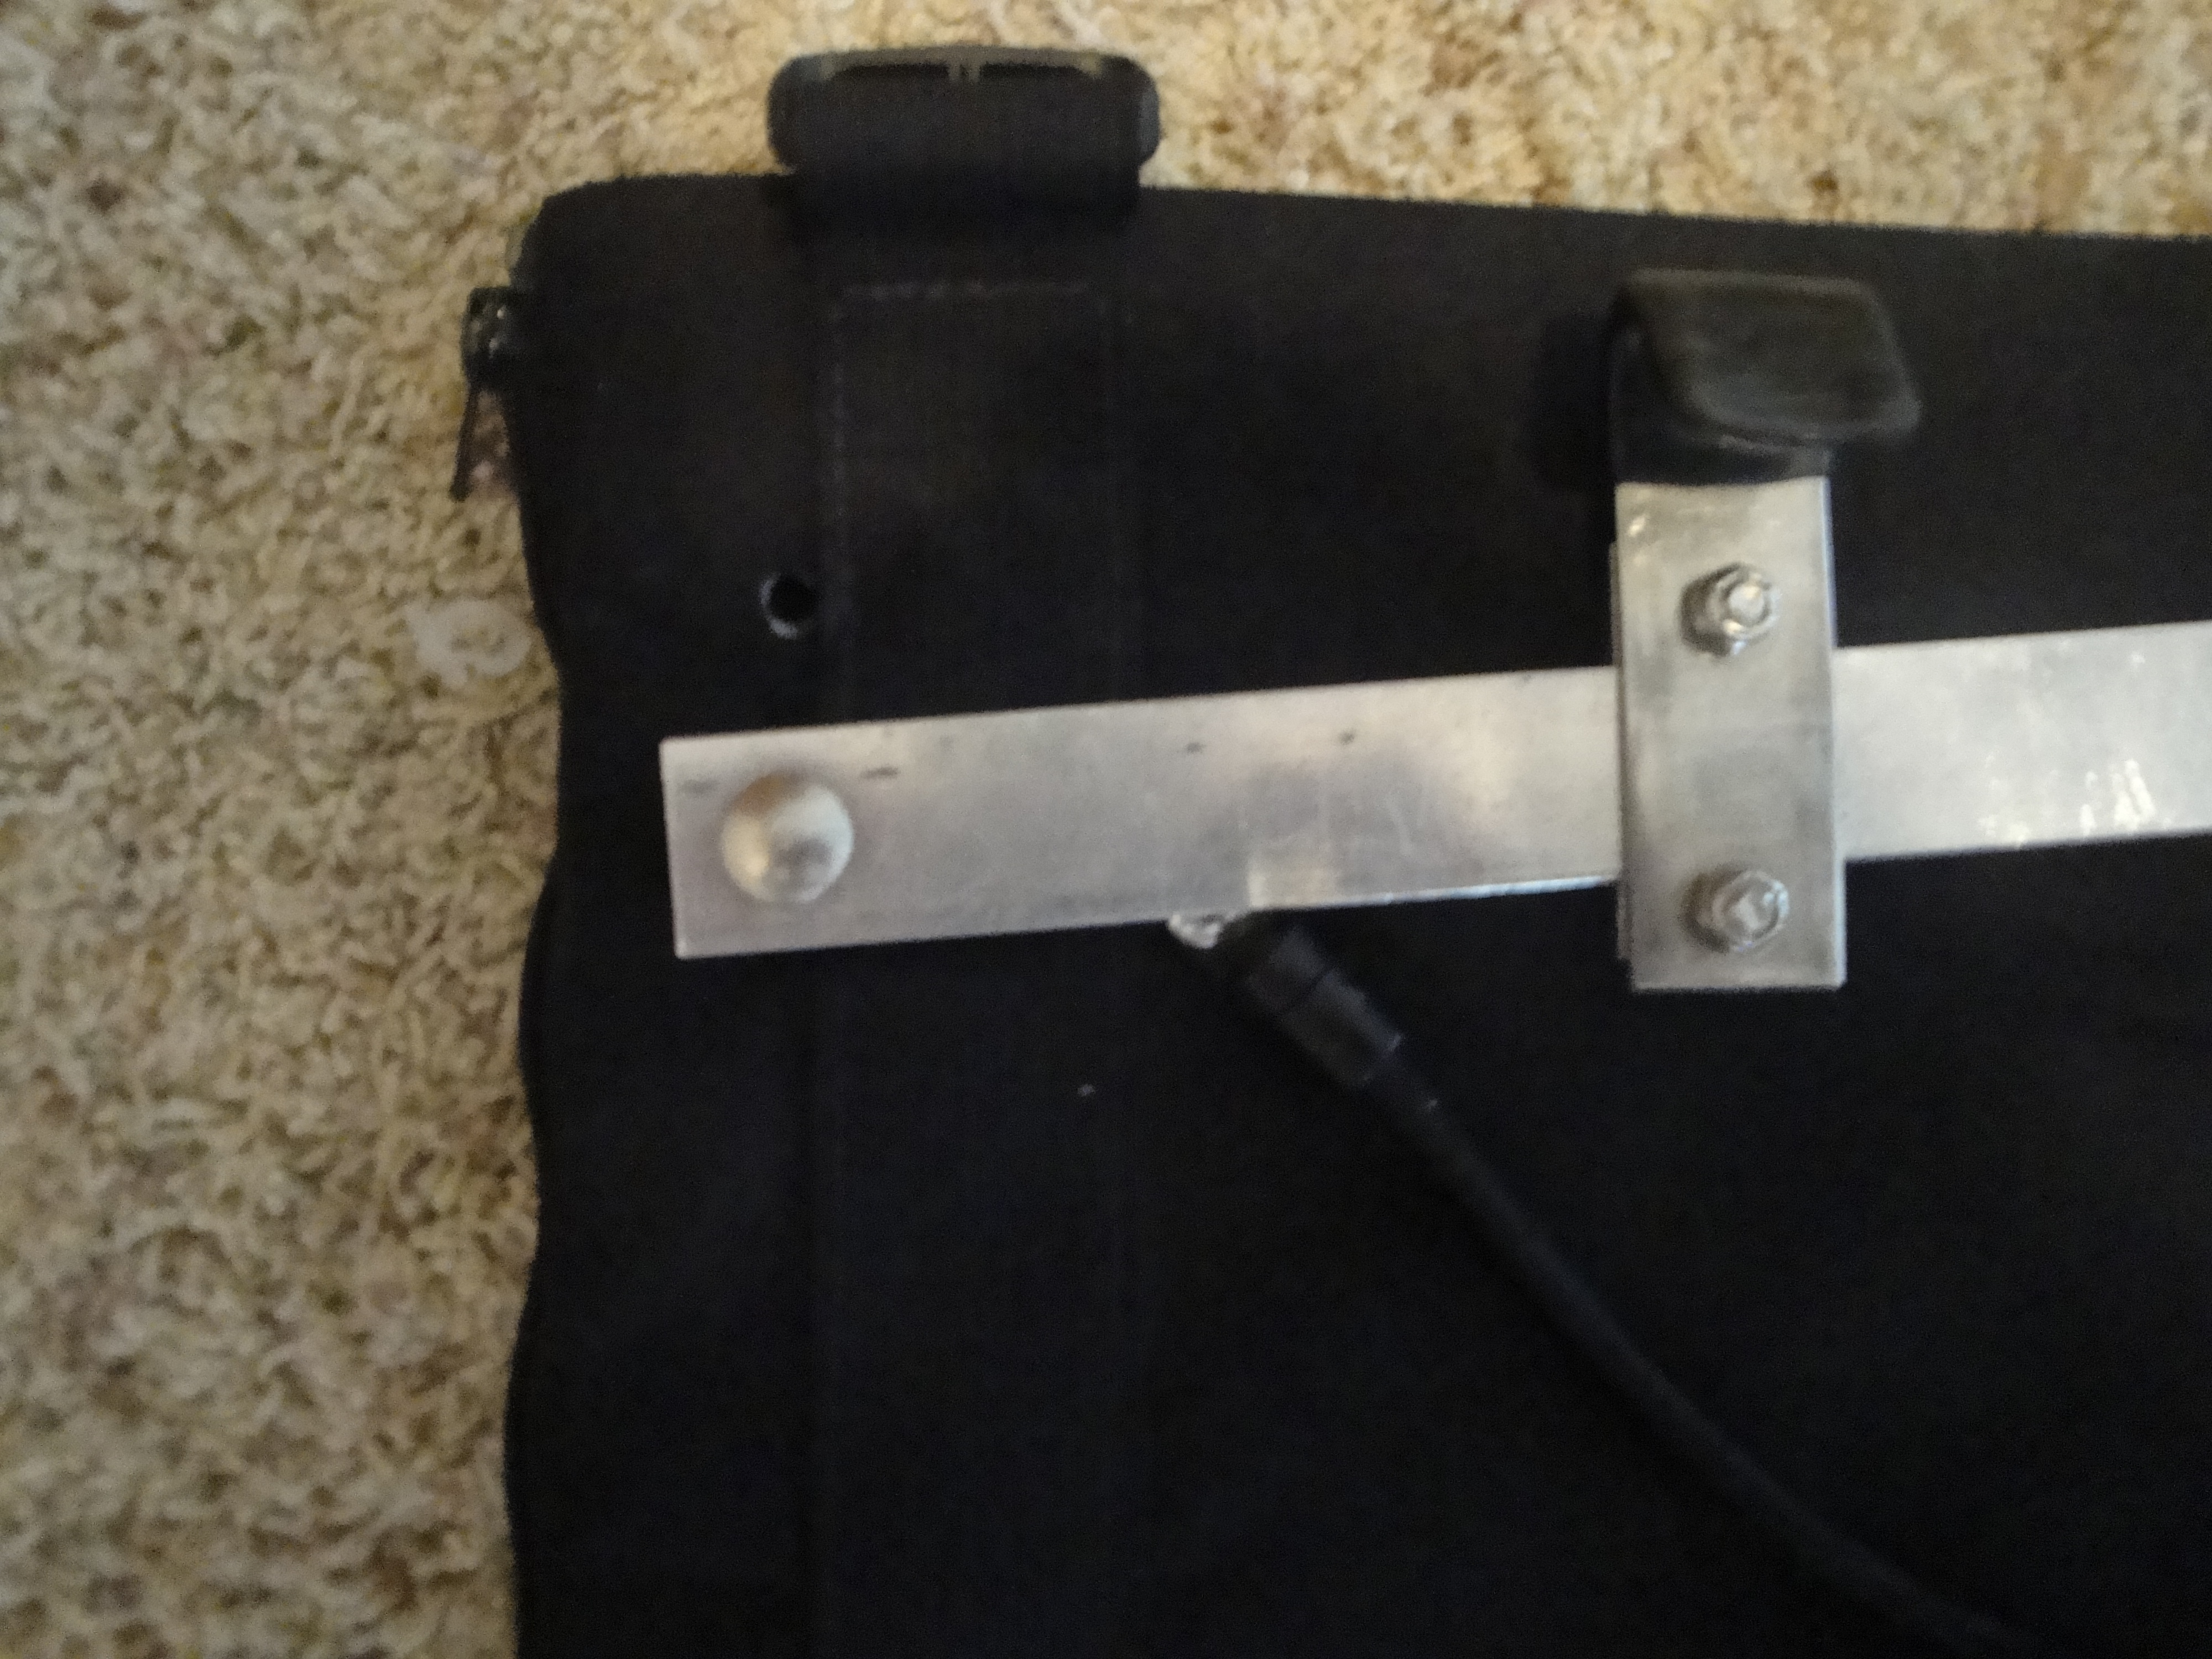
Drilling through the canvas actually turned out to be surprisingly difficult. I was using a standard drill bit, so I’m thinking it just never “grabbed” – and thus getting through the canvas was more of a friction / wearing down operation than a drilling operation. However, I was able to get cleanly through the plastic sheet on the inside once the canvas was pierced.
I chose to rotate the bar down as far as I could – which put me right up against the riveted pin that anchored the bungee cord. It would actually have been possible to rotate further by also relocating the bungee cord anchor, but I decided to try it without that extra step first to see if it worked out.
After I drilled the first pannier, I stuffed the bag with towels and a ubolt to simulate a fully loaded bag and mounted it on the bike. It was a good, stable fit on the lower rails, with the vertical bar going up to the upper rails in the rear actually providing additional stability. I had the bike already mounted on my training rollers so that I could actually test the fit out in as close to real-world as possible without actually going outside. The result? I had about an inch of clearance with my heal artificially stretched out as far as possible while clipped in to the pedals. Success!
 This simple modification took me maybe 30 minutes at most – including my silly mistake of drilling the wrong end of the second pannier!However, it saved me perhaps a couple of hundred dollars or so in the short term. At some point I’m going to have to upgrade to something a little more weatherproof anyhow, but as we head into spring this is probably something that I can put off for now. And even after I do get different panniers, these bags will be a lot more useful and usable for trips to the store, camping, or whatever else may come up.
Again, a big thanks to Wayne for the whole idea of modifying these in this way, and for the great service getting the rack itself fit to my bike properly. One of these days I’ll pick up a set of forks that are the same geometry, but with eyelets in ’em and get a rack on the front too.